What Are Our Top 3 FAQs At The Time of Application?
The rule of thumb for customer education is that ‘if one customer has a question, it’s safe to assume that other customers have the same question.’ When we were discussing this as a team, we decided to share our top 3 FAQs from customers when they are applying EonCoat to their carbon steel asset using a Dual Component Cartridge Spray Gun.
EonCoat 101
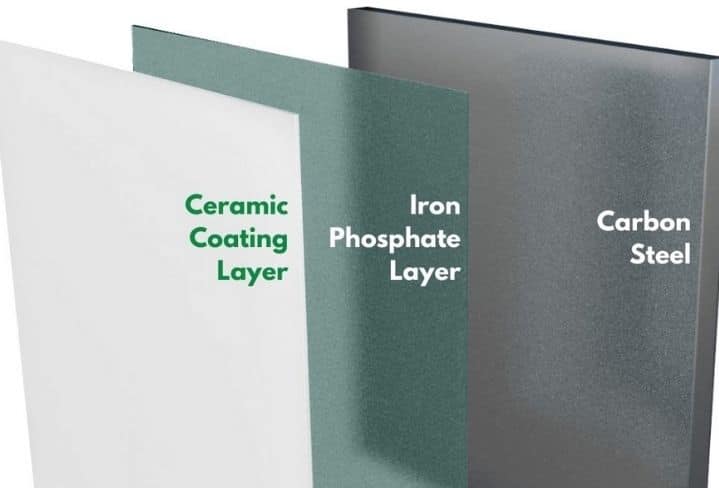
Before we get started with the questions and answers, let’s begin with a quick EonCoat lesson. We engineered EonCoat to be an acid phosphate that can is directly applied to carbon steel – emphasis on the word directly. Therefore, there can be no mill scale, old paint, grease, oil, or dirt between the EonCoat and the carbon steel. Additionally, EonCoat was designed to have a soluble phosphate layer – and the metal cannot corrode as long as the phosphate is present.
EonCoat Loves Flash Rust
Notice that we did not include flash rust in the list of things you must remove prior to application. This is because eonCoat bonds well to flash rust – seeing that on a substrate lets us know that the carbon steel is reactive. If you want to see the complete Surface Preparation Guide, click here.
FAQ #1: How Do I Know If My Equipment Is Working Correctly?
Tony Collins and I have both asked and answered this question – from both the field and our offices. We understand the concern before you start wasting time and money. No one wants to be the person who breaks the equipment on the first use. For this article, we will focus on the Dual Component Cartridge Spray Gun.
The Spray Gun uses 600 mL cartridges of EonCoat – that’s 300 mL of Part A and 300 mL of Part B. When you receive the EonCoat cartridges, they will look like the image below, and you will receive 10 (ten) of these cartridges per shipping pail.

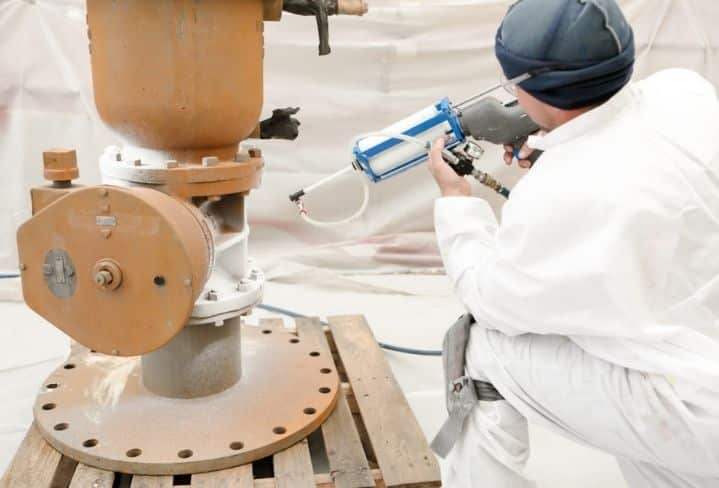
If you purchase a Starter Kit, you’ll get one pail (10 cartridges) of the appropriate product and a Nordson Pneumatic Spray Gun. The engineering and financial beauty of the Spray Gun is that you can use it alone or with a high-pressure plural pump spray system. Additionally, the two parts of EonCoat in the cartridges require no mixing – you simply shake the cartridges for 60 seconds prior to starting to use. As you’ll see in the image below, this applicator is using a cartridge gun to adequately spray some smaller areas (nooks and crannies for those of us in the industry) on an otherwise large carbon substrate.
Start At The Beginning
Let’s start from a foundational level. At the risk of sounding like your middle school science teacher, always begin by reading the instruction manual that comes with your equipment. Hold on to that manual or know where you can locate it online. If the manufacturer has a how-to video for set up and cleanup – make sure your applicators have watched those. Maintaining and understanding your application equipment should never be the responsibility of one individual. On our YouTube channel, the best YouTube videos related to using the Spray Gun are:
- How To Use Nordson Pneumatic Cartridge Gun With EonCoat
- How To Do A Small Touch Up With EonCoat
- How To Check MIL Thickness While Spraying EonCoat
The Problem And Problem Solving
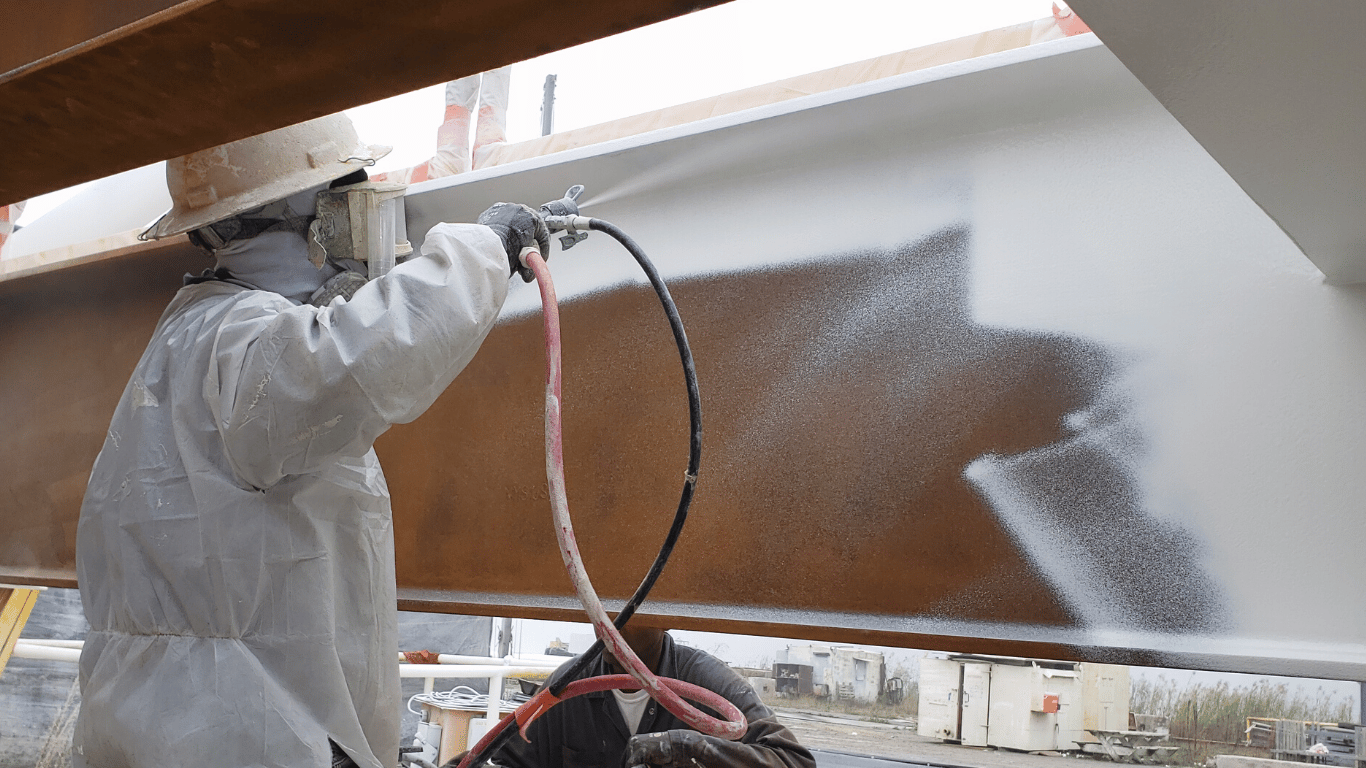
The Dual Component Spray Gun utilizes a valve gun and a static mixing tip. The most common question is about how much air to use. The air should be at a low-pressure setting to apply EonCoat – just enough to atomize the coating as it meets and mixes. The coating will bubble and leave pinholes if you have too much air. If this happens, the EonCoat will still bond, but the finish will not appear as smooth as it could appear. You can sand the bubbled EonCoat and continue your job with the air in a reduced setting. A well-applied coating will have a smooth finish.
Four Easy Tips
- Shake the cartridge for 60 seconds before inserting it into the Spray Gun.
- Make sure you start spraying by draining into a waste receptacle before spraying EonCoat on the substrate.
- You can’t change the piston speed (that determines the fluid flow rate) while the trigger is applied.
- Load the EonCoat cartridges from the bottom first, pushing down on the spring-loaded pistons.
FAQ #2: How Rapidly Do I Move The Dual Component Cartridge Spray Gun?
The next most common question we receive about using the Spray Gun is how quickly to move the gun during the application process. The applicator should move the Spray Gun at a steady, slow, and deliberate pace. You’ll want to provide about 20% – 30% overlap as you spray. An ideal pace is moving the Spray Gun enough to apply 20 mils/500 microns in a few passes. Then, while the EonCoat is still wet and tacky (you’ve got just a few moments), you can spray additional passes to accomplish the desired thickness. Remember, EonCoat is dry-to-touch in 5 minutes and has completely cured in 15 minutes. See FAQ # 3 about how to measure the application.
FAQ # 3: How Do You Know If You Are Spraying Correctly And Successfully?
There are two ways to know if you are spraying correctly and successfully. The first method of understanding is to take a wet film thickness (WFT) during the application process. Ideally, the person who takes the measurements will not be the person continuing to use the Spray Gun. Remember – you don’t want to let the EonCoat sit in the static mixer. It will react and become clogged. So, keep spraying while another person measures. If measuring isn’t necessarily inside of your comfort zone, here’s a great video from a WFT manufacturer.
The subsequent measurement of a successful application job is dry film thickness (DFT). The definition of DFT is a measurement of the dry and cured material after all liquid has evaporated. Again, there are multiple tool options for testing DFT.
Finally, a NACE III inspector at an application site might use a RollerFORM Scanner Phased Array Wheel Probe from Olympus to measure the bond of EonCoat to the carbon steel asset. A chemical bond (EonCoat) looks different from a mechanical bond (our competitors) when using this tool.
The Final Exam of Application Success
The final test to let you know if you have successfully applied EonCoat is more like a look in the rearview mirror. If you followed the Surface Preparation Guide and the EonCoat was correctly applied to a clean carbon steel asset, it’s time to pressure wash the air-cured EonCoat. Set your pressure washer to a minimum of 3000 PSI to clean the asset (as if you were going to apply a topcoat). EonCoat was specifically engineered to let you know if it has not bonded to the carbon steel. If the EonCoat was not applied successfully, the velocity of the pressure washing will cause EonCoat to disbond. While this may cause temporary frustration, it’s better to know and fix it now than to find out the hard way in 6 months.
Ready to Learn More About EonCoat?