We want to focus on the job of a NACE inspector on the worksite of an EonCoat application job. First, let’s all agree on one basic principle – we all need qualified NACE Inspectors! We are all clear that the inspector’s job is to ensure that coatings are used and applied correctly. The Coating Inspector Certification Program (CIP) is both comprehensive and requires hands-on practice. Any worksite job should have the same two requirements. Before we can talk about what a NACE inspector does at an EonCoat application site, let’s take a quick look at EonCoat’s application standards.
Be Clear On Application Standards
The overarching thing to remember about applying EonCoat is this – if you get a good chemical bond to the substrate, you will get excellent results. This is because we engineered EonCoat with enough phosphate in the ceramic to permanently prevent corrosion, especially if the cement has tightly adhered to the metal.
The critical point occurs after you prepare the surface. Because surface preparation aims to get a chemical bond, the surface must be accessible and reactive! That means no oil or contamination on the surface and no grit left in the profile. But, most importantly – is it reactive? Testing your surface for reactivity is as simple as tossing a cup of saltwater on the substrate. If your surface is ready, you’ll see a brown rust stain in approximately 15 minutes. But if your prepared surface does not react with the elements (as in flash rust), it may also not react sufficiently with the acid in EonCoat to form an alloyed layer.
We recommend using a pressure washer at 3000 PSI minimum to clean a blasted surface before applying EonCoat. The pressure washer will remove any grit in the blast profile. After pressure washing, expect to see a brown surface composed of flash rust. The presence of flash rust shows that the surface is clean and reactive. In addition, any water beading on the surface indicates that there is oil present, and it must come off.
The Inspector During Application
Now let’s bring in the NACE Level 3 inspector! This certification requires that the individual has already passed Levels 1 and 2, has at least 5 years of corrosion work experience with coatings, and must sit for an exam. So tip your hard hat when this person comes onsite!
The inspector’s role is much more involved in the coating process than just checking afterward at a hold point. The reason for having the inspector present during the application is that the coating must be applied thick enough, while still wet, to supply sufficient acid to alloy the surface. For example, an applicator can apply 5 mils, then come back and apply 15 more mils to reach the 20 mil spec. Unfortunately, a substrate treated this way will not have an alloy layer, and it will not have a strong chemical bond.
A worse outcome is that a thin first pass allowed to dry may create such a poor interface that the ceramic disbonds. Once the first pass has dried, no amount of added EonCoat will improve the bond at the coating/metal interface. Visually, after the fact, the inspector will not know it. Eventually, the extreme volume of phosphate in the ceramic will fix this error – but in the intermediate term, you may see pitting corrosion bleed through the ceramic.
The Inspector After Application
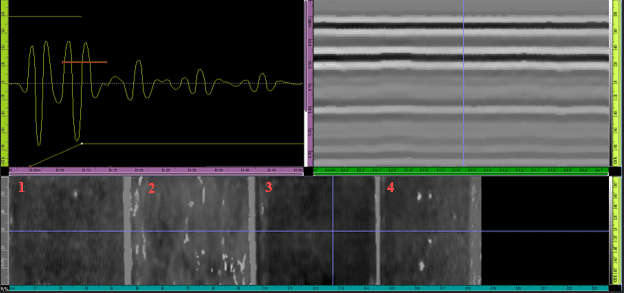
Suppose the inspector does not see you actively applying the EonCoat. In that case, the only way to know that EonCoat was applied correctly is to use an ultrasonic phased array scanning tool like the Rollerform from Olympus.
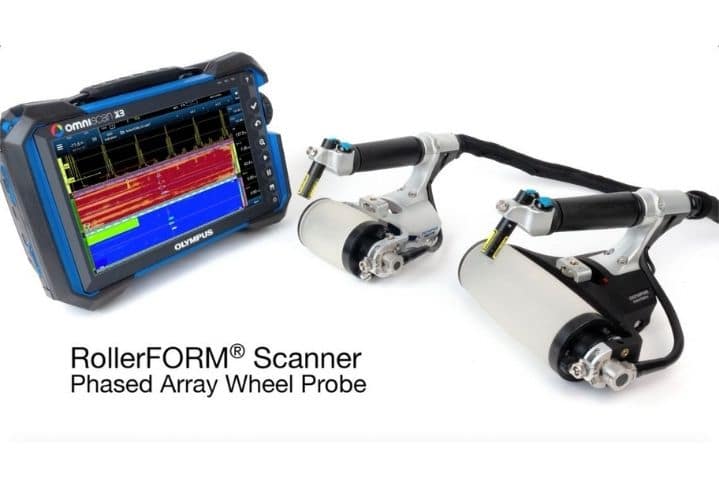
When a NACE inspector uses this tool, it will clearly show the intimacy of the bond, and confirm that acid reacted with the metal and the alloy layer. Mechanical bonds do not look like chemical bonds under this examination. Even spots as tiny as 12mm that are poorly bonded will appear in this examination.
A qualified NACE inspector would see the poorly bonded samples in the photos below. They are poorly bonded and easily distinguishable from the properly bonded samples when evaluating the C-Scan images below. All 4 samples were scanned from Side A and show mostly good bonds throughout, except for some surface porosity in samples 1 and 4, and a weaker bond overall in sample 2.
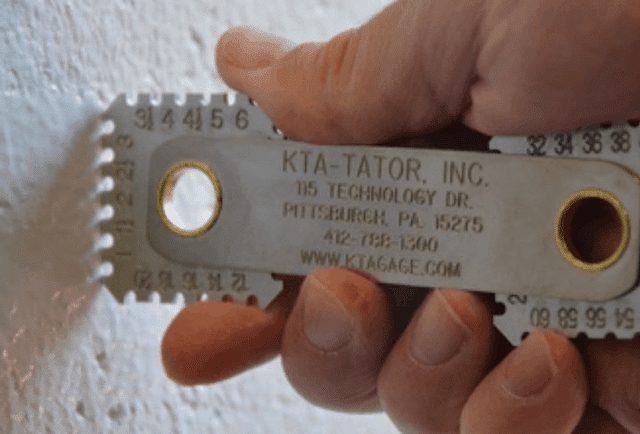
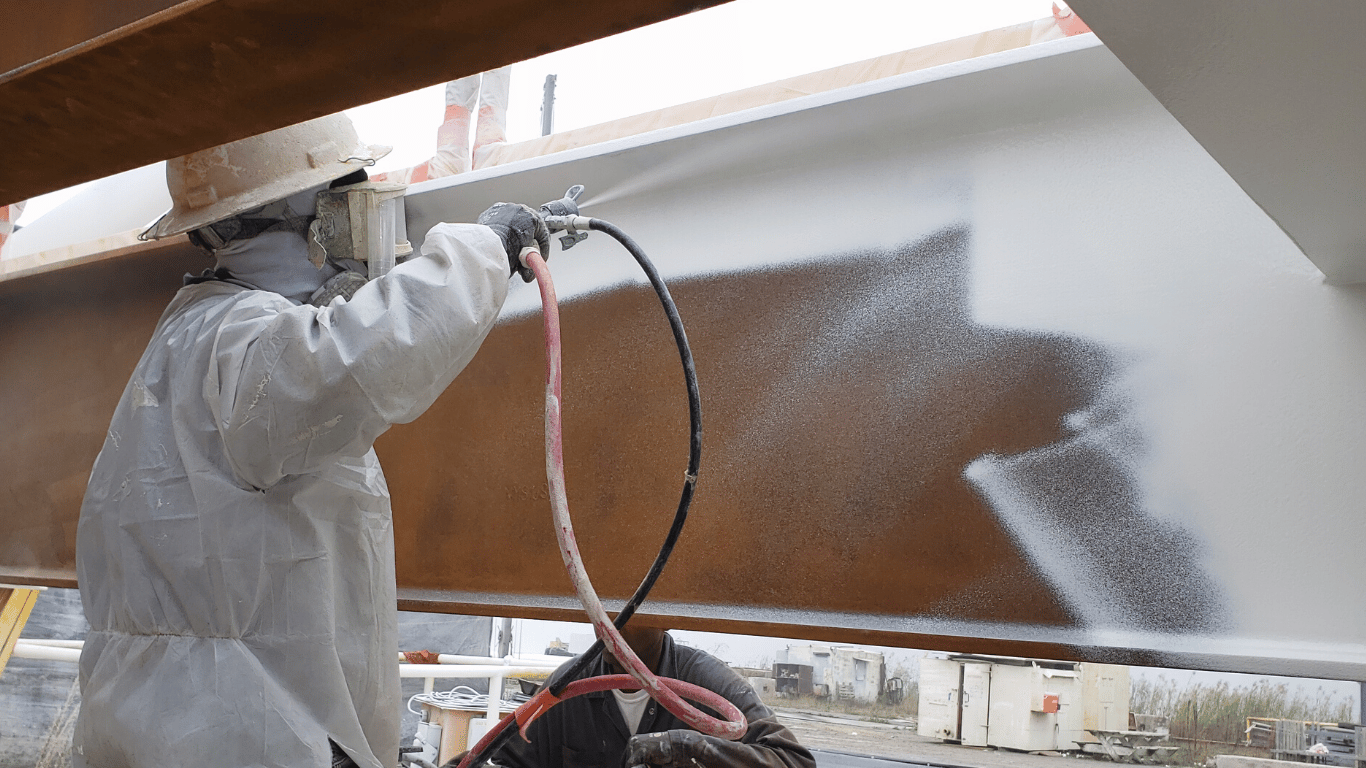
During the coating process, the NACE inspector should see the applicator, or applicator helper, constantly using a wet film gauge and calling out the measured thicknesses. This measure-and-call process will allow the applicator to apply more coating while the ceramic is still wet. Applying additional passes of EonCoat to reach the recommended 20 mils thickness while the initial pass is still wet is mission-critical.
The inspector should also note any areas of overspray or thin-film thickness at the edge of the spray. A pressure washer should remove the overspray or thin layer of coating if that happens. It is acceptable to pressure wash right up to the edge where the coating is applied correctly. The inspector should ensure that the passes are applied with some velocity. A wispy pass can allow material to sit on top of the substrate. However, we want enough velocity to push the ceramic into the blast profile so that there is a chemical bond to metal everywhere.
If you follow these guidelines and utilize your NACE inspector, the chances for error are small. However, a pressure washer test will likely find the poorly bonded spots if there are errors.
The Tools For The Inspector Job
An ultrasonic phased array wheel probe (we’re using the Olympus model for the sake of consistency – this is NOT a paid ad) is a more technical and exact method to find poorly bonded spots. A related tool called the ScanTech XR Scanner uses a raster system instead of phased array. It purports to be much faster, up to a 48-inch-wide scan at a rate of thirteen inches per minute. ScanTech has provided test data demonstrating the efficacy, but customers have not seen the need for this level of inspection so far.
When the NACE inspector identifies improperly applied areas, the repair of EonCoat is simple. You simply chip off the ceramic and scrape as far back as possible. A scraper will not remove EonCoat’s well-bonded ceramic layer. Feather the edges with a palm sander for a smooth transition. You tape around the area to prevent overspray from getting on the adjacent, properly-applied coating. It is unnecessary to remove any tightly bonded ceramic from the substrate. No additional surface preparation is necessary to correct the previously improperly applied area. The acid from EonCoat will have cleaned and prepped the surface. Simply apply EonCoat, typically with a cartridge gun, for repairs. Then use the palm sander to smooth any high spots at the transition points. You may apply a topcoat for looks if that’s a concern.
Next Steps
If you want more detailed information about applying EonCoat, you can review the EonCoat Application Guide. In addition, we have a downloadable, printable checklist to make it easier for the onsite folks, who are frequently outdoors. As always, feel free to contact us directly if you have any questions.
Do you, or your NACE inspector, have additional questions about how to apply EonCoat or verify the application is correct, thorough, and complete? Feel free to Contact us. We typically respond to inquiries within hours, but will definitely respond to your inquiry within 24 business hours.
Ready to Learn More About EonCoat?